Hosted Git
If you don’t want to go through all of the work involved in setting up your own Git server, you have several options for hosting your Git projects on an external dedicated hosting site. Doing so offers a number of advantages: a hosting site is generally quick to set up and easy to start projects on, and no server maintenance or monitoring is involved. Even if you set up and run your own server internally, you may still want to use a public hosting site for your open source code — it’s generally easier for the open source community to find and help you with.
These days, you have a huge number of hosting options to choose from, each with different advantages and disadvantages. To see an up-to-date list, check out the following page:
https://git.wiki.kernel.org/index.php/GitHostingBecause we can’t cover all of them, and because I happen to work at one of them, we’ll use this section to walk through setting up an account and creating a new project at GitHub. This will give you an idea of what is involved.
GitHub is by far the largest open source Git hosting site and it’s also one of the very few that offers both public and private hosting options so you can keep your open source and private commercial code in the same place. In fact, we used GitHub to privately collaborate on this book.
GitHub
GitHub is slightly different than most code-hosting sites in the way that it namespaces projects. Instead of being primarily based on the project, GitHub is user-centric. That means when I host my grit project on GitHub, you won’t find it at github.com/grit but instead at github.com/schacon/grit. There is no canonical version of any project, which allows a project to move from one user to another seamlessly if the first author abandons the project.
GitHub is also a commercial company that charges for accounts that maintain private repositories, but anyone can quickly get a free account to host as many open source projects as they want. We’ll quickly go over how that is done.
Setting Up a User Account
The first thing you need to do is set up a free user account. If you visit the "Plans and pricing" page at https://github.com/pricing and click the "Sign Up" button on the Free account (see Figure 4-2), you’re taken to the signup page.
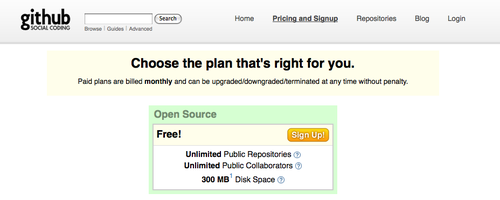 Figure 4-2. The GitHub plan page.
Here you must choose a username that isn’t yet taken in the system and enter an e-mail address that will be associated with the account and a password (see Figure 4-3).
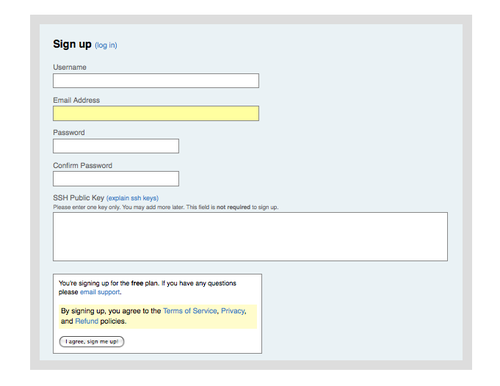 Figure 4-3. The GitHub user signup form.
If you have it available, this is a good time to add your public SSH key as well. We covered how to generate a new key earlier, in the "Simple Setups" section. Take the contents of the public key of that pair, and paste it into the SSH Public Key text box. Clicking the "explain ssh keys" link takes you to detailed instructions on how to do so on all major operating systems. Clicking the "I agree, sign me up" button takes you to your new user dashboard (see Figure 4-4).
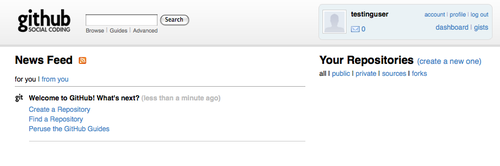 Figure 4-4. The GitHub user dashboard.
Next you can create a new repository.
Creating a New Repository
Start by clicking the "create a new one" link next to Your Repositories on the user dashboard. You’re taken to the Create a New Repository form (see Figure 4-5).
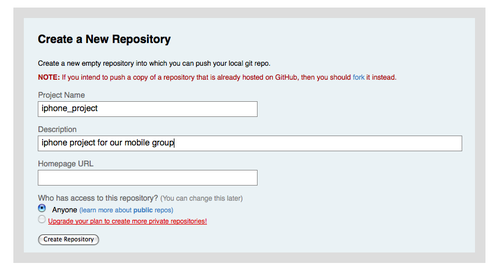 Figure 4-5. Creating a new repository on GitHub.
All you really have to do is provide a project name, but you can also add a description. When that is done, click the "Create Repository" button. Now you have a new repository on GitHub (see Figure 4-6).
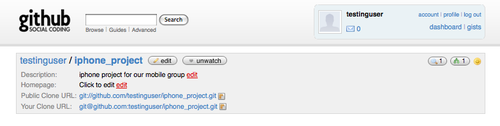 Figure 4-6. GitHub project header information.
Since you have no code there yet, GitHub will show you instructions for how create a brand-new project, push an existing Git project up, or import a project from a public Subversion repository (see Figure 4-7).
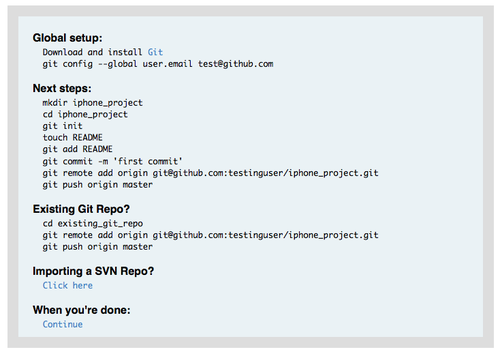 Figure 4-7. Instructions for a new repository.
These instructions are similar to what we’ve already gone over. To initialize a project if it isn’t already a Git project, you use
$ git init
$ git add .
$ git commit -m 'initial commit'
When you have a Git repository locally, add GitHub as a remote and push up your master branch:
$ git remote add origin git@github.com:testinguser/iphone_project.git
$ git push origin master
Now your project is hosted on GitHub, and you can give the URL to anyone you want to share your project with. In this case, it’s http://github.com/testinguser/iphone_project. You can also see from the header on each of your project’s pages that you have two Git URLs (see Figure 4-8).
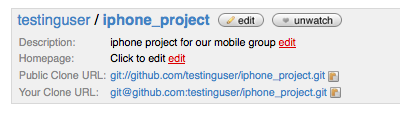 Figure 4-8. Project header with a public URL and a private URL.
The Public Clone URL is a public, read-only Git URL over which anyone can clone the project. Feel free to give out that URL and post it on your web site or what have you.
The Your Clone URL is a read/write SSH-based URL that you can read or write over only if you connect with the SSH private key associated with the public key you uploaded for your user. When other users visit this project page, they won’t see that URL—only the public one.
Importing from Subversion
If you have an existing public Subversion project that you want to import into Git, GitHub can often do that for you. At the bottom of the instructions page is a link to a Subversion import. If you click it, you see a form with information about the import process and a text box where you can paste in the URL of your public Subversion project (see Figure 4-9).
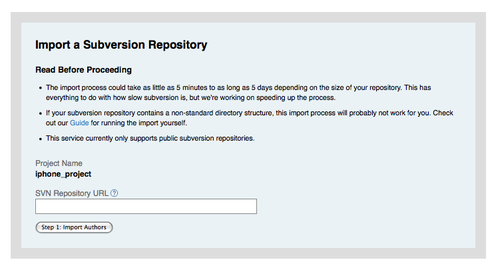 Figure 4-9. Subversion importing interface.
If your project is very large, nonstandard, or private, this process probably won’t work for you. In Chapter 7, you’ll learn how to do more complicated manual project imports.
Adding Collaborators
Let’s add the rest of the team. If John, Josie, and Jessica all sign up for accounts on GitHub, and you want to give them push access to your repository, you can add them to your project as collaborators. Doing so will allow pushes from their public keys to work.
Click the "edit" button in the project header or the Admin tab at the top of the project to reach the Admin page of your GitHub project (see Figure 4-10).
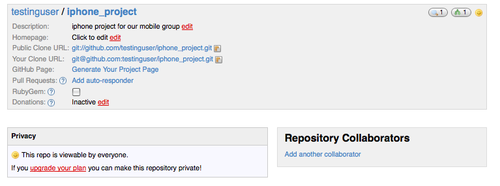 Figure 4-10. GitHub administration page.
To give another user write access to your project, click the “Add another collaborator” link. A new text box appears, into which you can type a username. As you type, a helper pops up, showing you possible username matches. When you find the correct user, click the Add button to add that user as a collaborator on your project (see Figure 4-11).
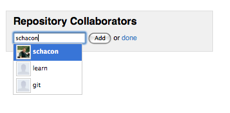 Figure 4-11. Adding a collaborator to your project.
When you’re finished adding collaborators, you should see a list of them in the Repository Collaborators box (see Figure 4-12).
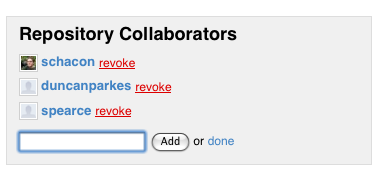 Figure 4-12. A list of collaborators on your project.
If you need to revoke access to individuals, you can click the "revoke" link, and their push access will be removed. For future projects, you can also copy collaborator groups by copying the permissions of an existing project.
Your Project
After you push your project up or have it imported from Subversion, you have a main project page that looks something like Figure 4-13.
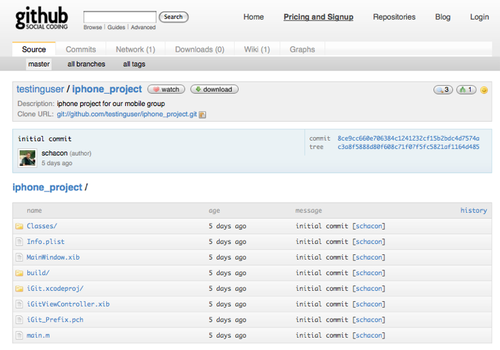 Figure 4-13. A GitHub main project page.
When people visit your project, they see this page. It contains tabs to different aspects of your projects. The Commits tab shows a list of commits in reverse chronological order, similar to the output of the git log command. The Network tab shows all the people who have forked your project and contributed back. The Downloads tab allows you to upload project binaries and link to tarballs and zipped versions of any tagged points in your project. The Wiki tab provides a wiki where you can write documentation or other information about your project. The Graphs tab has some contribution visualizations and statistics about your project. The main Source tab that you land on shows your project’s main directory listing and automatically renders the README file below it if you have one. This tab also shows a box with the latest commit information.
Forking Projects
If you want to contribute to an existing project to which you don’t have push access, GitHub encourages forking the project. When you land on a project page that looks interesting and you want to hack on it a bit, you can click the "fork" button in the project header to have GitHub copy that project to your user so you can push to it.
This way, projects don’t have to worry about adding users as collaborators to give them push access. People can fork a project and push to it, and the main project maintainer can pull in those changes by adding them as remotes and merging in their work.
To fork a project, visit the project page (in this case, mojombo/chronic) and click the "fork" button in the header (see Figure 4-14).
 Figure 4-14. Get a writable copy of any repository by clicking the "fork" button.
After a few seconds, you’re taken to your new project page, which indicates that this project is a fork of another one (see Figure 4-15).
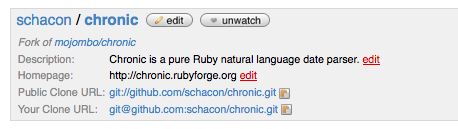 Figure 4-15. Your fork of a project.
GitHub Summary
That’s all we’ll cover about GitHub, but it’s important to note how quickly you can do all this. You can create an account, add a new project, and push to it in a matter of minutes. If your project is open source, you also get a huge community of developers who now have visibility into your project and may well fork it and help contribute to it. At the very least, this may be a way to get up and running with Git and try it out quickly.