Installing Git
Let’s get into using some Git. First things first—you have to install it. You can get it a number of ways; the two major ones are to install it from source or to install an existing package for your platform.
Installing from Source
If you can, it’s generally useful to install Git from source, because you’ll get the most recent version. Each version of Git tends to include useful UI enhancements, so getting the latest version is often the best route if you feel comfortable compiling software from source. It is also the case that many Linux distributions contain very old packages; so unless you’re on a very up-to-date distro or are using backports, installing from source may be the best bet.
To install Git, you need to have the following libraries that Git depends on: curl, zlib, openssl, expat, and libiconv. For example, if you’re on a system that has yum (such as Fedora) or apt-get (such as a Debian based system), you can use one of these commands to install all of the dependencies:
$ yum install curl-devel expat-devel gettext-devel \
  openssl-devel zlib-devel perl-devel asciidoc xmlto

$ apt-get install libcurl4-gnutls-dev libexpat1-dev gettext \
  libz-dev libssl-dev
When you have all the necessary dependencies, you can go ahead and grab the latest snapshot from the Git web site:
http://git-scm.com/downloadThen, compile and install:
$ tar -zxf git-1.7.2.2.tar.gz
$ cd git-1.7.2.2
$ make prefix=/usr/local all
$ sudo make prefix=/usr/local install
After this is done, you can also get Git via Git itself for updates:
$ git clone git://git.kernel.org/pub/scm/git/git.gitInstalling on Linux
If you want to install Git on Linux via a binary installer, you can generally do so through the basic package-management tool that comes with your distribution. If you’re on Fedora, you can use yum:
$ yum install gitOr if you’re on a Debian-based distribution like Ubuntu, try apt-get:
$ apt-get install gitInstalling on Mac
There are three easy ways to install Git on a Mac. The easiest is to use the graphical Git installer, which you can download from the SourceForge page (see Figure 1-7):
http://sourceforge.net/projects/git-osx-installer/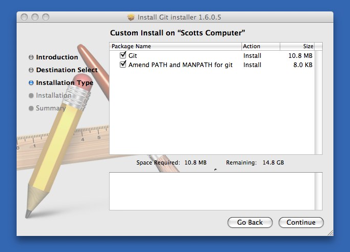 Figure 1-7. Git OS X installer.
The other major way is to install Git via MacPorts (http://www.macports.org). If you have MacPorts installed, install Git via
$ sudo port install git +svn +doc +bash_completion +gitwebYou don’t have to add all the extras, but you’ll probably want to include +svn in case you ever have to use Git with Subversion repositories (see Chapter 8).
Homebrew (http://brew.sh/) is another alternative to install Git. If you have Homebrew installed, install Git via
$ brew install gitInstalling on Windows
Installing Git on Windows is very easy. The msysGit project has one of the easier installation procedures. Simply download the installer exe file from the GitHub page, and run it:
http://msysgit.github.ioAfter it’s installed, you have both a command-line version (including an SSH client that will come in handy later) and the standard GUI.
Note on Windows usage: you should use Git with the provided msysGit shell (Unix style), it allows to use the complex lines of command given in this book. If you need, for some reason, to use the native Windows shell / command line console, you have to use double quotes instead of single quotes (for parameters with spaces in them) and you must quote the parameters ending with the circumflex accent (^) if they are last on the line, as it is a continuation symbol in Windows.